Weebou Editorial Team
 In this article
A little preparation
Halloween crafts need little preparation, but a few minutes beforehand make a difference. Cut the base shapes yourself from a sturdy cardboard box or thick paper: a window frame, a pumpkin outline, a doorway and a set of large eyes and mouths. Lay them flat on a wipe-clean table or a tray, which keeps the pieces together and catches glue drips. Keep a damp cloth nearby and a dry spot where finished work can sit undisturbed. Fifteen to twenty-five minutes of making suits most children; stop while your child still has an idea to try.
Use glue sticks or washable white glue, and follow the age guidance on the label of anything that stays on your child's skin. An adult handles craft knives and any cutting that is not right for the child's age; supervised children can cut soft card with rounded-tip scissors, as in these first scissor activities. Skip tiny decorations such as beads, sequins and googly eyes for children who still mouth objects — torn paper, wool and crayon marks work just as well. If you use a torch for the shadow shapes, keep it low, never shine it into eyes and hold it yourself.

Ideas to try together
Cardboard window creature with real shutters
A creature behind a window is a character, not just a drawing, and the shutters give your child control over when it appears. Cutting the frame from a sturdy box means the card survives being opened and closed many times. Choosing the eyes and mouth before drawing the body helps children plan, and naming the creature afterwards turns a quick make into something they return to.
 You’ll need
- A rectangle of sturdy cardboard, about A4 size
- A craft knife and a cutting mat (adult use)
- Thick crayons or felt-tip pens
- A glue stick and paper scraps
- Sticky tape for the shutters
How to do it
- Cut a window out of the card, leaving a wide frame all the way round, and fold the removed piece in half to make two shutters.
- Tape the shutters along the outside edges of the window so they really open and close.
- Ask your child to draw the creature inside the empty window: a face first, then a body if there is room.
- Offer paper scraps for horns, ears or a hat, and let your child glue them wherever they think they belong.
- Try the shutters together. Ask what the creature does when nobody is looking, and write the answer on the frame if your child wants it kept.
- Lean the window on a shelf or tape it to a door at your child's eye level.
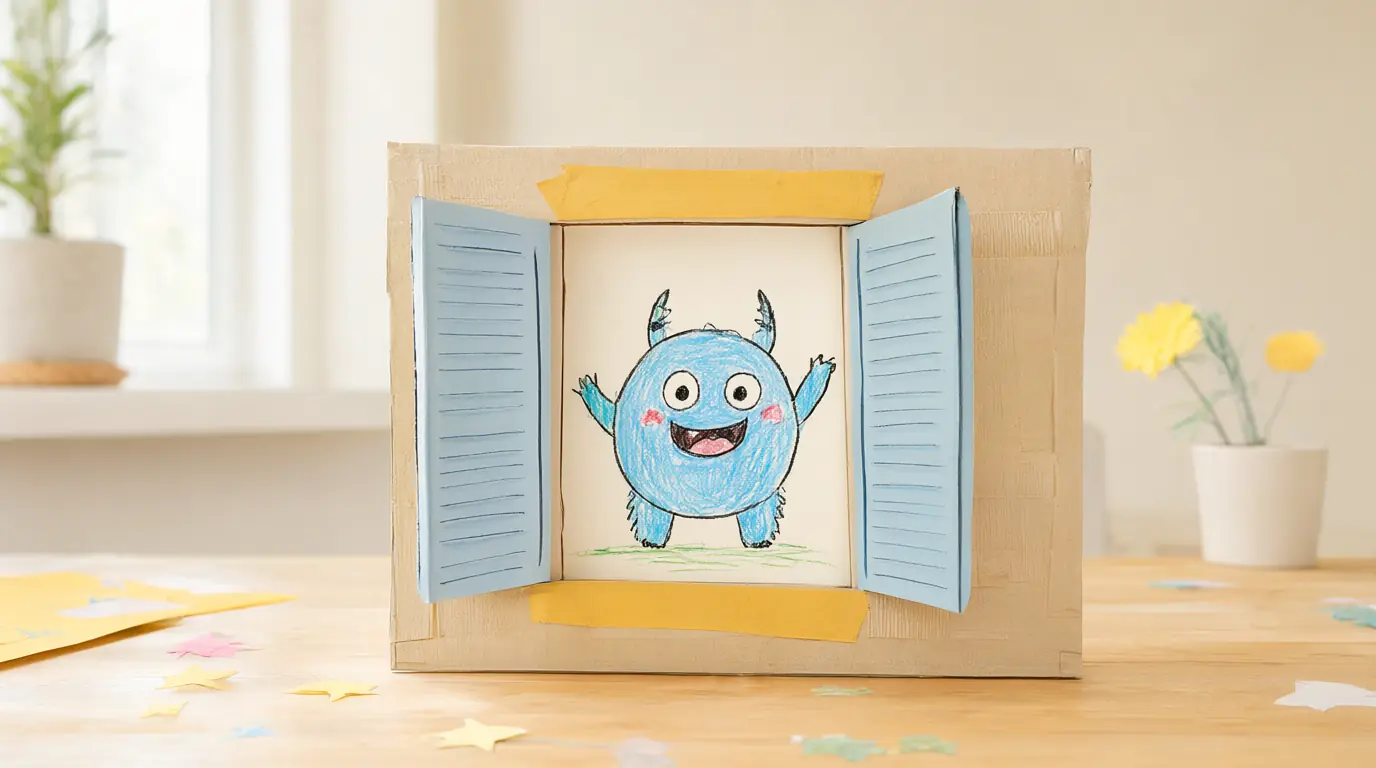
Make it your own: Three-year-olds can draw a single face and leave the shutters open. Older children can add a second creature on the back of the card, so the window shows a different visitor each time it is turned around.
Paper pumpkin faces to try before gluing
Arranging the pieces loose on the table first lets children test several expressions without committing to one. It is also a quiet way to talk about feelings: the same slanted eyebrows can look cross to one child and puzzled to another, and both readings are worth hearing. Gluing comes last, so nothing is wasted if your child changes their mind.
You’ll need
- A large orange paper pumpkin outline, cut in advance
- Pre-cut dark paper eyes, eyebrows and mouths
- A glue stick
- A few spare paper shapes for unexpected additions
How to do it
- Lay the pumpkin outline flat and tip the loose face pieces onto the table.
- Build one expression together, then move a single eyebrow and ask what changed.
- Let your child arrange a face they like without gluing anything yet.
- Ask them to tell you what the pumpkin is thinking, and write it on the back if they want.
- Glue the chosen pieces one at a time, pressing each for a few seconds.
- Hang the pumpkin on a door or wall where your child can see it from their own height.
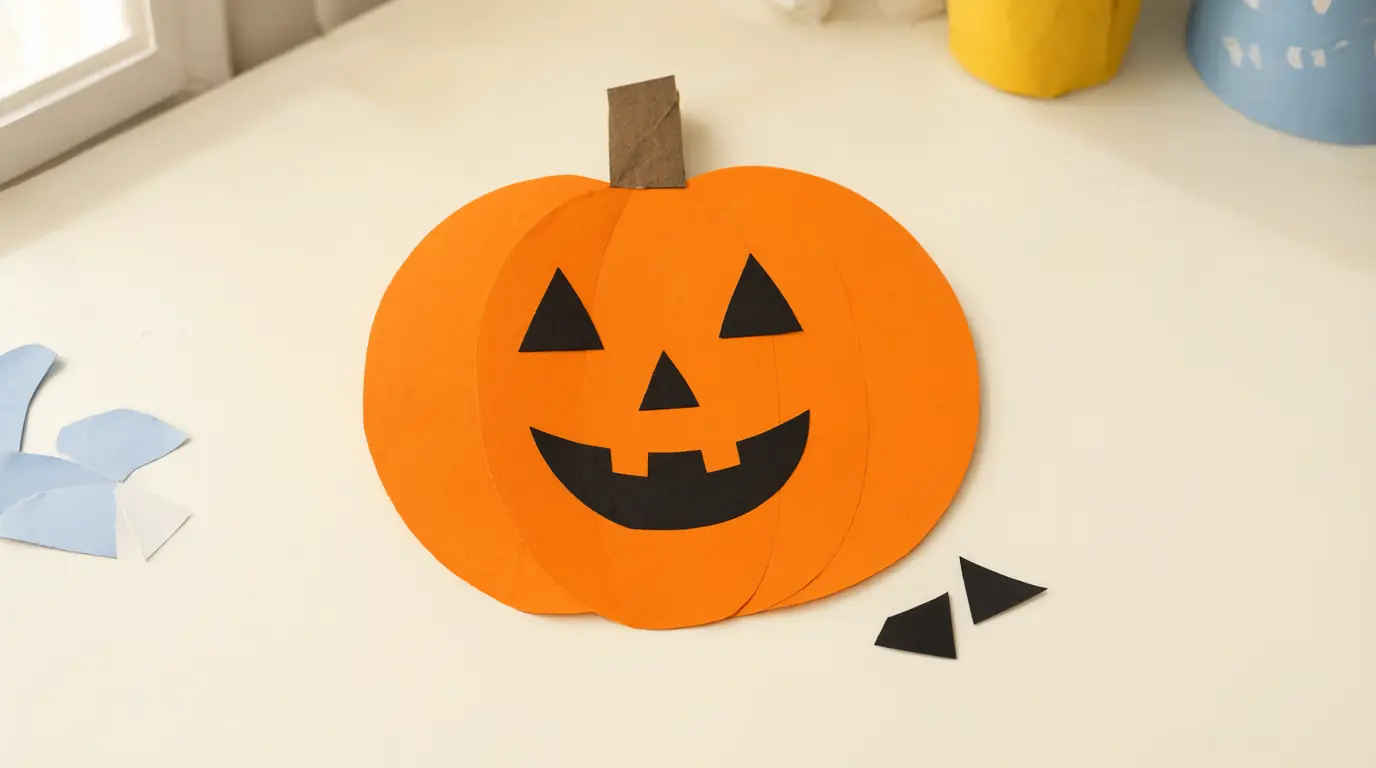
Make it your own: For younger children, offer fewer pieces — two eyes and one mouth is plenty. Older children can cut their own shapes, or make a second pumpkin showing the opposite mood and hang the pair together.
A folded story doorway
A folded door that opens onto a drawing invites storytelling because the picture stays hidden until someone knocks. Children who find it hard to start a story often relax when a small character asks the questions instead. The craft is quick, but the door survives many retellings, and new residents can be drawn on fresh paper and taped inside.
You’ll need
- A sheet of thick paper or light card
- Crayons or felt-tip pens
- Child-safe scissors, with supervision
- Tape
How to do it
- Fold the paper in half like a greetings card.
- On the front, draw a tall door shape. An adult cuts along its top and one side through the front layer only, so the door opens on a hinge.
- Open the door and let your child draw who lives inside: a cat, a friendly ghost, a pumpkin family.
- Draw the outside of the house on the closed flap — a doorknob, a window, a number.
- Knock on the door together and take turns being the visitor and the person who answers.
- Tape the story to the fridge or a door if your child wants to keep playing with it later.
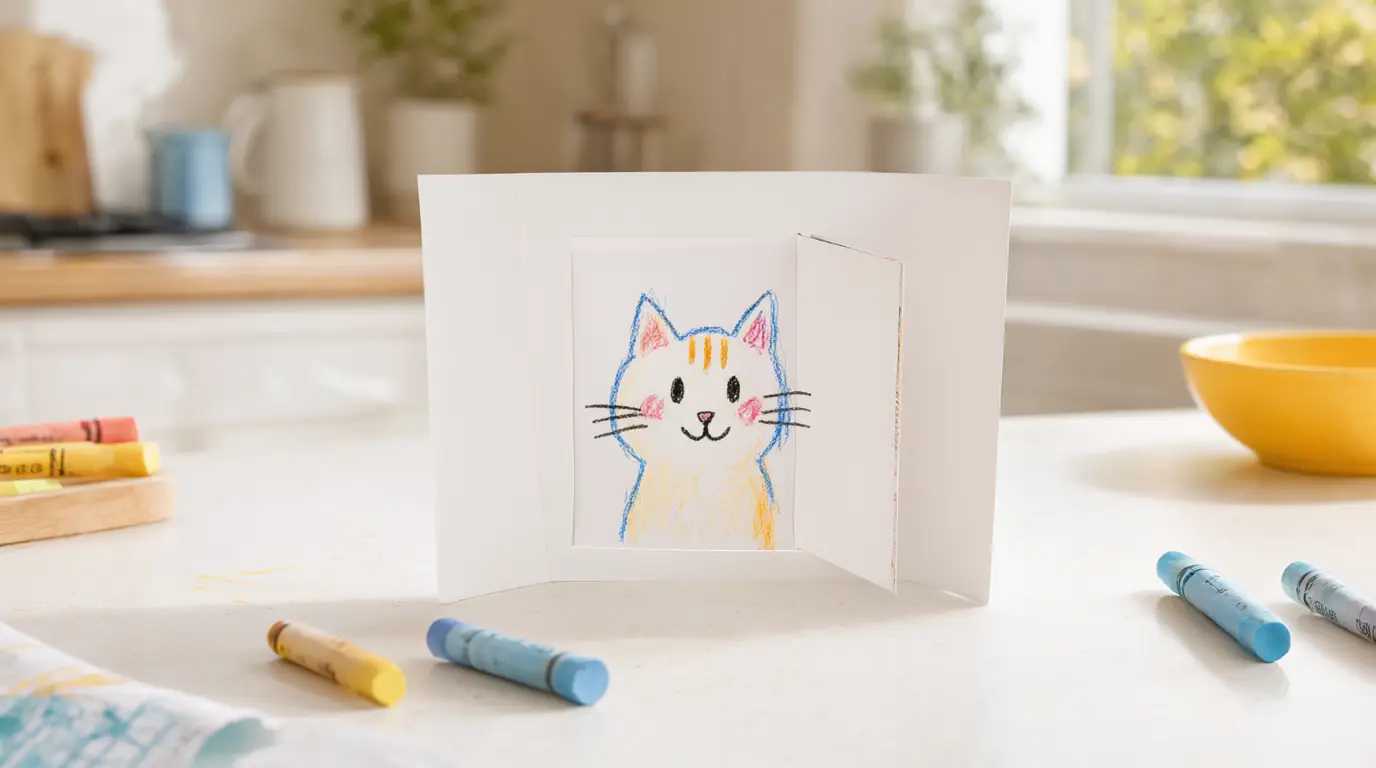
Make it your own: Younger children may only manage the drawing and the knocking; an adult can cut and fold. Older children can add a second room, a note slipped under the door or a list of who is allowed inside.
Shadow shapes in a torch-lit scene
Dark paper shapes on a pale background make a bold picture, and holding it up to a lamp or torch adds a second layer of magic. Building the scene from separate shapes means children can slide a bat, a moon or a cat around before anything is fixed down. It suits children who like making pictures but dislike drawing detail.
You’ll need
- A sheet of pale card as the background
- Dark paper or black card, cut into simple shapes
- A glue stick
- A small torch, held by an adult
How to do it
- Cut out a few bold shapes in advance: a moon, a cat, a bat, a tree, a house.
- Let your child move the shapes around the pale card to find a scene they like.
- Talk about which shape should sit nearest and which can stay half hidden.
- Glue the shapes down once the arrangement feels right.
- Hold the finished picture in front of a wall and shine a torch from the side, without pointing it at anyone's eyes.
- Ask your child to give the scene a name and write it underneath in their words.
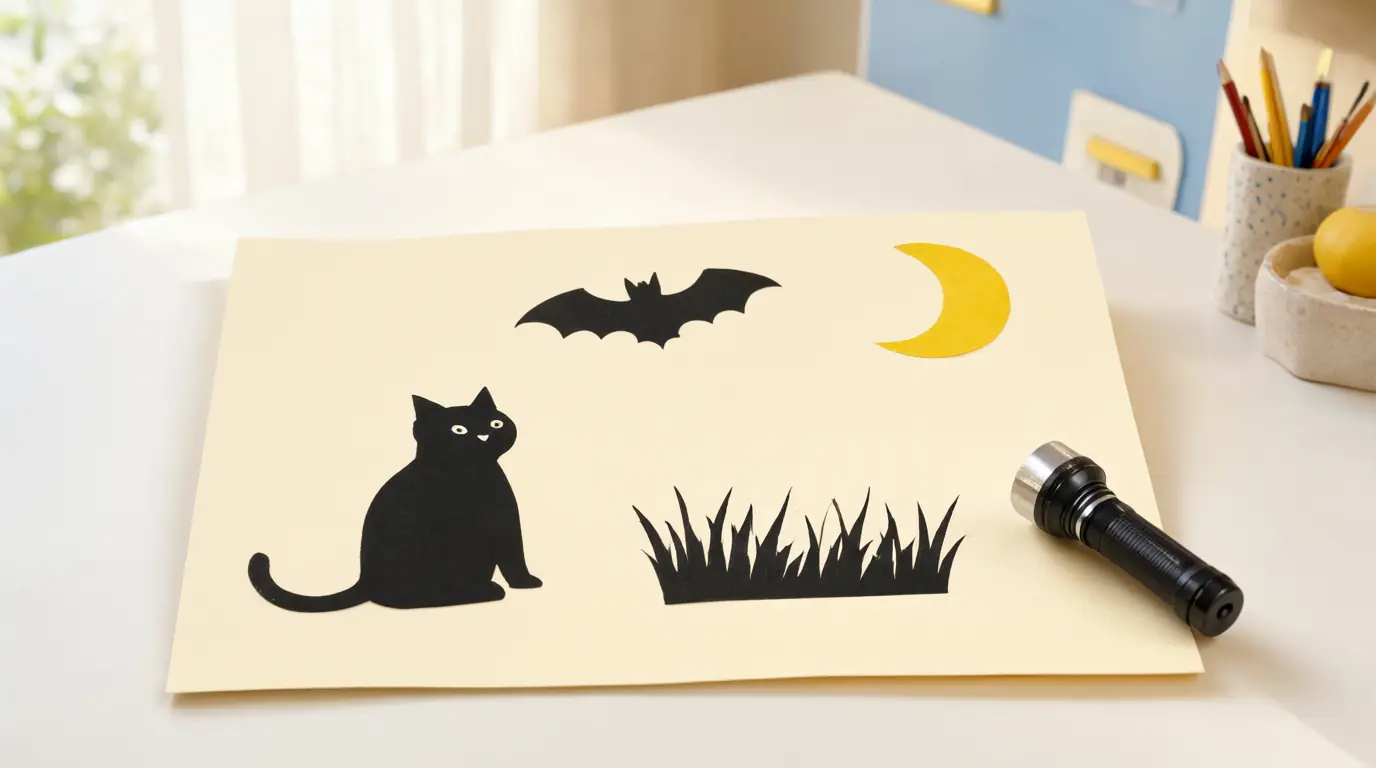
Make it your own: For two- and three-year-olds, use just three large shapes and let them place them anywhere. Older children can cut their own silhouettes, or make a second version of the same scene in reverse colours.
Torn-paper collage character
Tearing paper instead of cutting gives small hands a job they can do unaided, and the ragged edges make fur, wings and hair look convincing. Because there is no wrong shape, children who worry about getting things right tend to relax quickly. The finished collage also gives you a natural opening to talk about the creature's character rather than its looks.
You’ll need
- A big sheet of paper for the background
- Coloured paper, envelopes and magazine pages to tear
- A glue stick or a small pot of washable glue
- A shallow tray to keep the pieces together
How to do it
- Show your child how to hold paper with both hands and pull it slowly in two directions.
- Tear a pile of pieces together — long strips for legs, small squares for spots, wavy scraps for hair.
- Ask what kind of creature the pile could become, and let your child start placing the biggest pieces first.
- Glue the pieces down, sticking the body on before the details.
- Add drawn eyes or a mouth at the end if your child wants a face.
- Ask what the creature likes eating, and write the answer next to the picture.
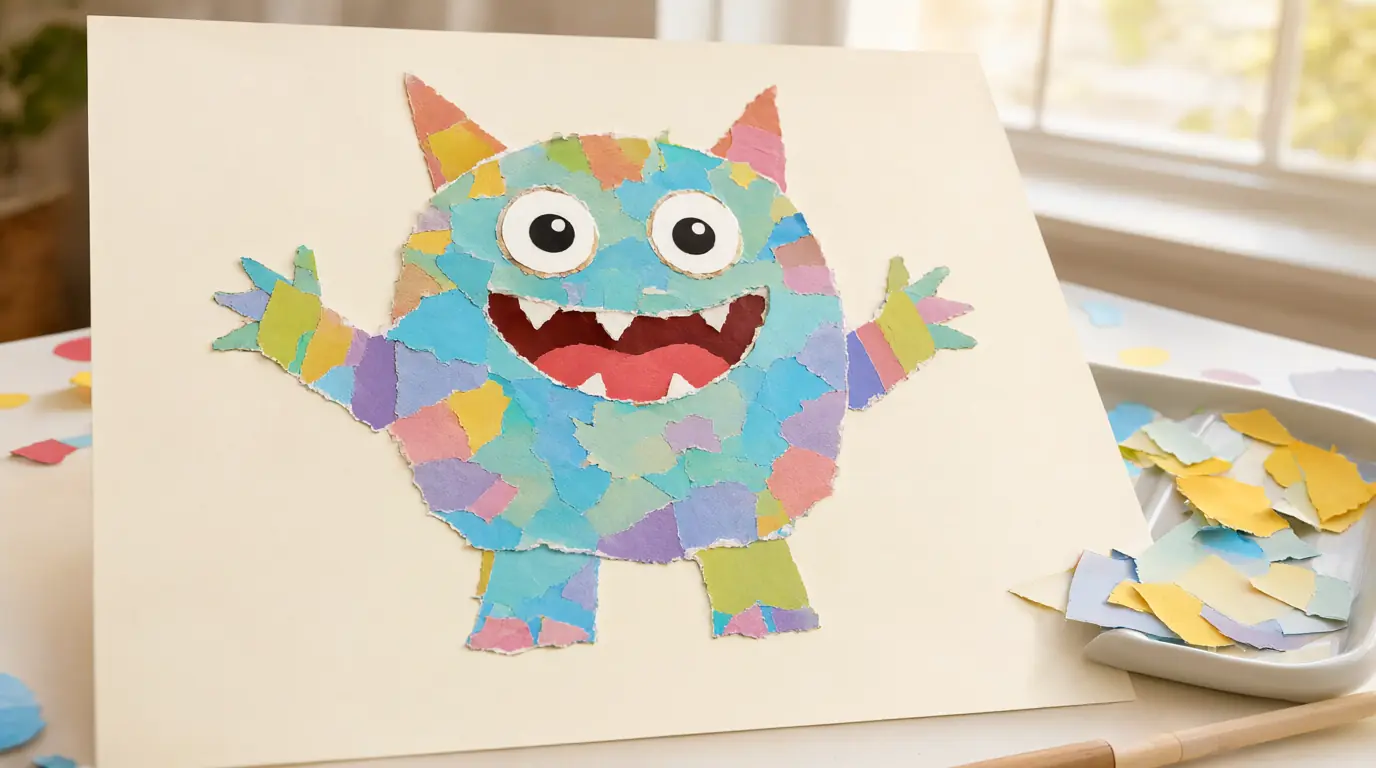
Make it your own: Two-year-olds can tear and stick with no plan at all — the texture is the point. Older children can plan a body, choose a habitat background or write a short label for a gallery of several creatures.

Make it work for your family
If a child loses interest halfway through, leave the pieces on the tray and come back later; unfinished work rarely stays unfinished for long. When glue seeps through thin paper, slip a spare sheet underneath and peel it away once dry. Markers that bleed can be swapped for crayons, and thick card is easier than flimsy paper for anything that will be handled or hung up. A child who copies nothing at all is doing fine — the creature does not need ears, a nose or a colour that makes sense to an adult.
Photograph each make before it goes on the wall, and let your child choose where it hangs. Write their own words underneath rather than a tidy caption, and keep a box for pieces that come loose so they can be repaired. If you would like more ideas that fit the same week, try these friendly Halloween activities or a set of silly Halloween jokes to tell while the glue dries.

Parents also ask
What Halloween crafts can a 3-year-old actually do?
Torn-paper collage and loose pumpkin faces suit three-year-olds best: no cutting is needed and there is no model to copy. Prepare the outlines yourself, use a glue stick, and expect the making to last ten to fifteen minutes. Ripping paper is a useful activity in its own right, so let them tear more pieces than the picture needs.
How do you make Halloween crafts that are not scary?
Keep the shapes bold and friendly: round eyes, wide smiles, cats, bats, pumpkins and little houses. Let your child decide the expression rather than supplying a frightening one, and skip masks, blood effects and jump scares. Talking about the character — what it eats, where it sleeps — turns it into a story rather than something to fear.
What can we use if we have no craft supplies at home?
An empty cereal box, a few envelopes, old magazines and a couple of crayons cover every idea in this article. Cardboard from packaging is sturdier than paper and works well for the window creature; envelopes and supermarket leaflets tear easily for collage. A pencil and a sheet of plain paper are enough for the pumpkin faces.
Choose materials and activities that suit your child, supervise as needed and adapt the ideas to their interests and abilities. About our editorial approach